What is the User Dashboard and How Do You Use It?
The User Dashboard is the central place for managing users within Vygo. It allows administrators to view user engagement, filter and segment users, perform bulk actions, and access detailed user insights.
The dashboard combines user management and engagement tracking into a single workflow, helping institutions manage communication, support, and program participation more efficiently.
Accessing the User Dashboard
To access the User Dashboard:
- Log into the Vygo platform
- Select the Admin icon
- Navigate to User Management
Your visibility and available actions within the dashboard will depend on your role and permissions.
Role-Based Visibility
User visibility within the dashboard depends on role permissions.
For example:
- Owners and Support Admins may view all users
- Program Admins only see users within their assigned programs
- Institution Staff Members do not have access to administrative user management features
For more information, see:
Roles and Permissions in Advanced User Management
Understanding the Dashboard
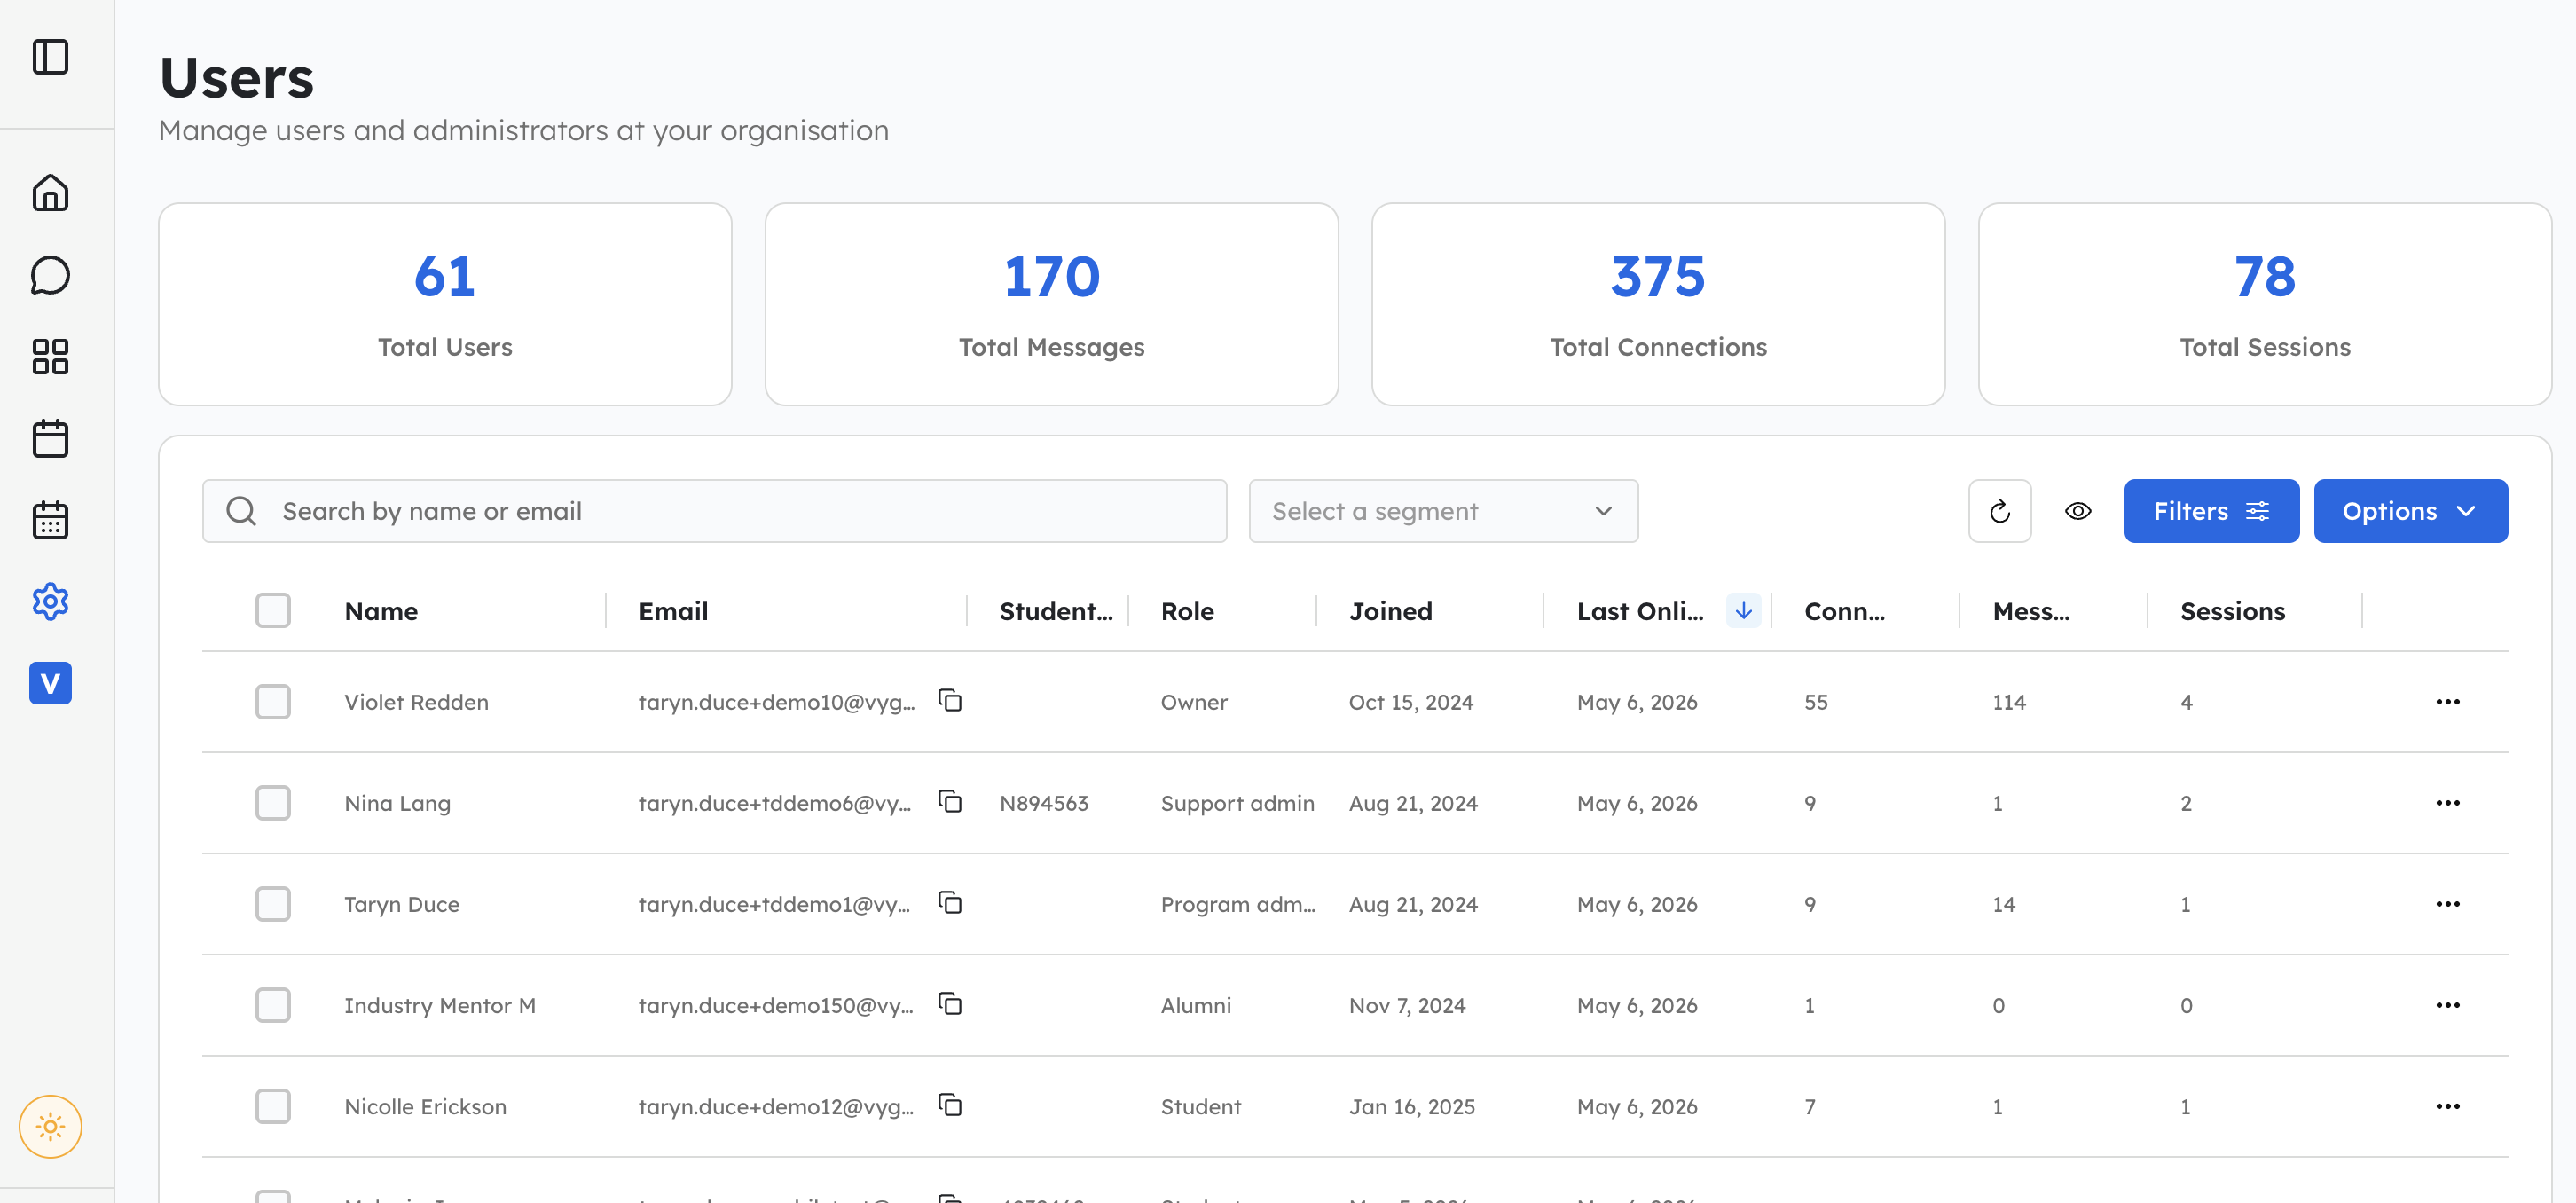
The User Dashboard displays user engagement information and management tools in a single view.
At the top of the dashboard, you’ll see engagement summary cards displaying metrics such as:
- Total users
- Messages sent
- Connections made
- Sessions completed
These metrics automatically update based on the filters applied.
For example, you can filter by:
- User role
- Programs
- Public tags
- Private tags
Customising Your Dashboard View
You can customise which columns appear in the dashboard by selecting the display settings icon.
This allows administrators to tailor the dashboard to suit their workflow and reporting needs.
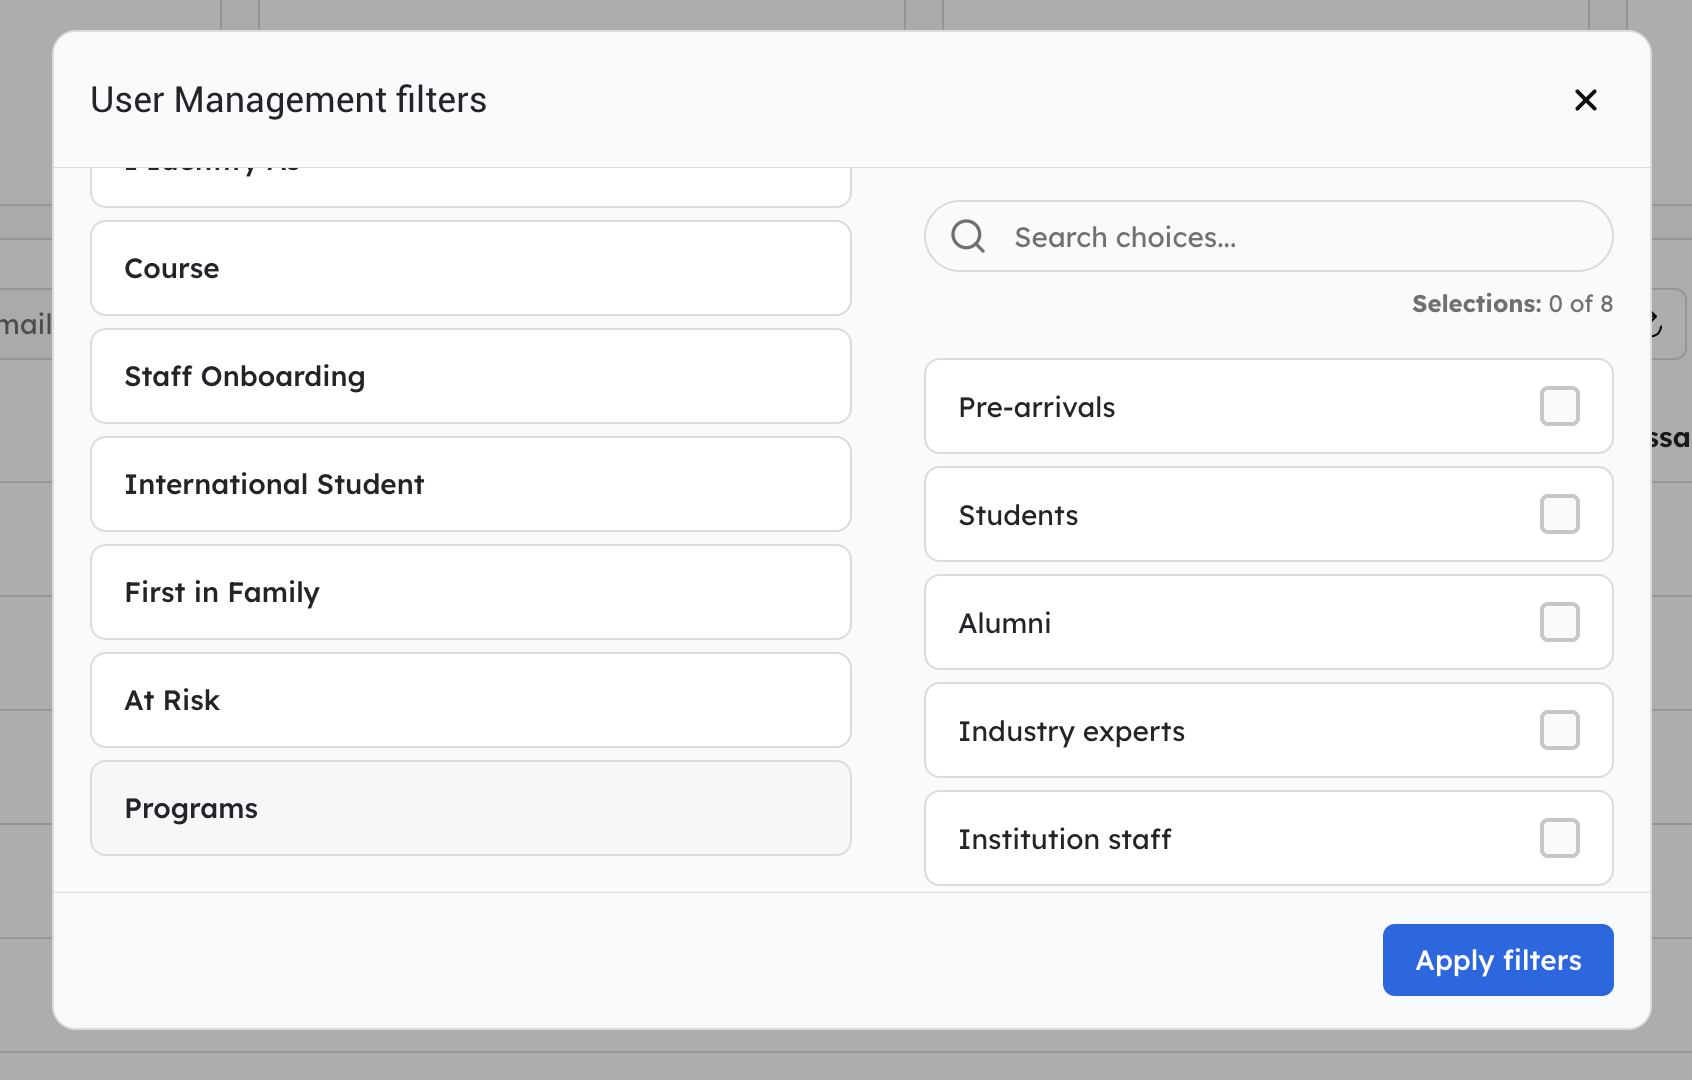
Filtering Users
Filters help narrow down the users displayed in the dashboard.
Available filters may include:
- Roles
- Programs
- Public Tags
- Private Tags
For example, administrators may filter:
- Students in a specific program
- Users with a specific support status
- Students identified as at-risk
- Alumni users
- Institution staff members
Important Note About Program Filters
When filtering users by program, the engagement data displayed remains organisation-level engagement data.
This means the dashboard shows:
- The users who belong to the selected program
- Their overall activity across the organisation
It does not display program-specific engagement metrics only.
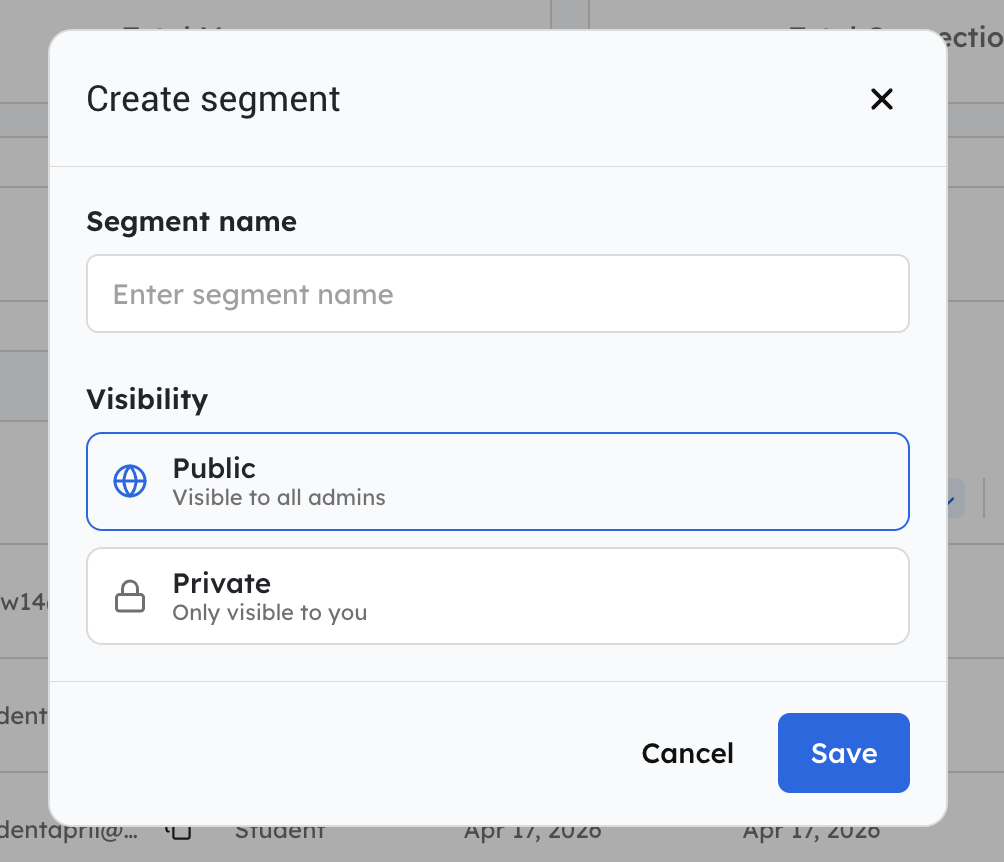
Creating Segments
Segments are saved groups of users based on applied filters.
For example, an institution may create segments for:
- At-risk students
- Pilot groups
- Specific support cohorts
- Students requiring follow-up
Once filters have been applied you are provided an option to save as a segment.
- Public Segment: Any admin can use that filter
- Private segment: only you can see and use that filter
Filters vs Segments
- Filters temporarily narrow the users displayed
- Segments save those filtered user groups for future use
Viewing User Insights
Selecting a user opens their User Insights profile.
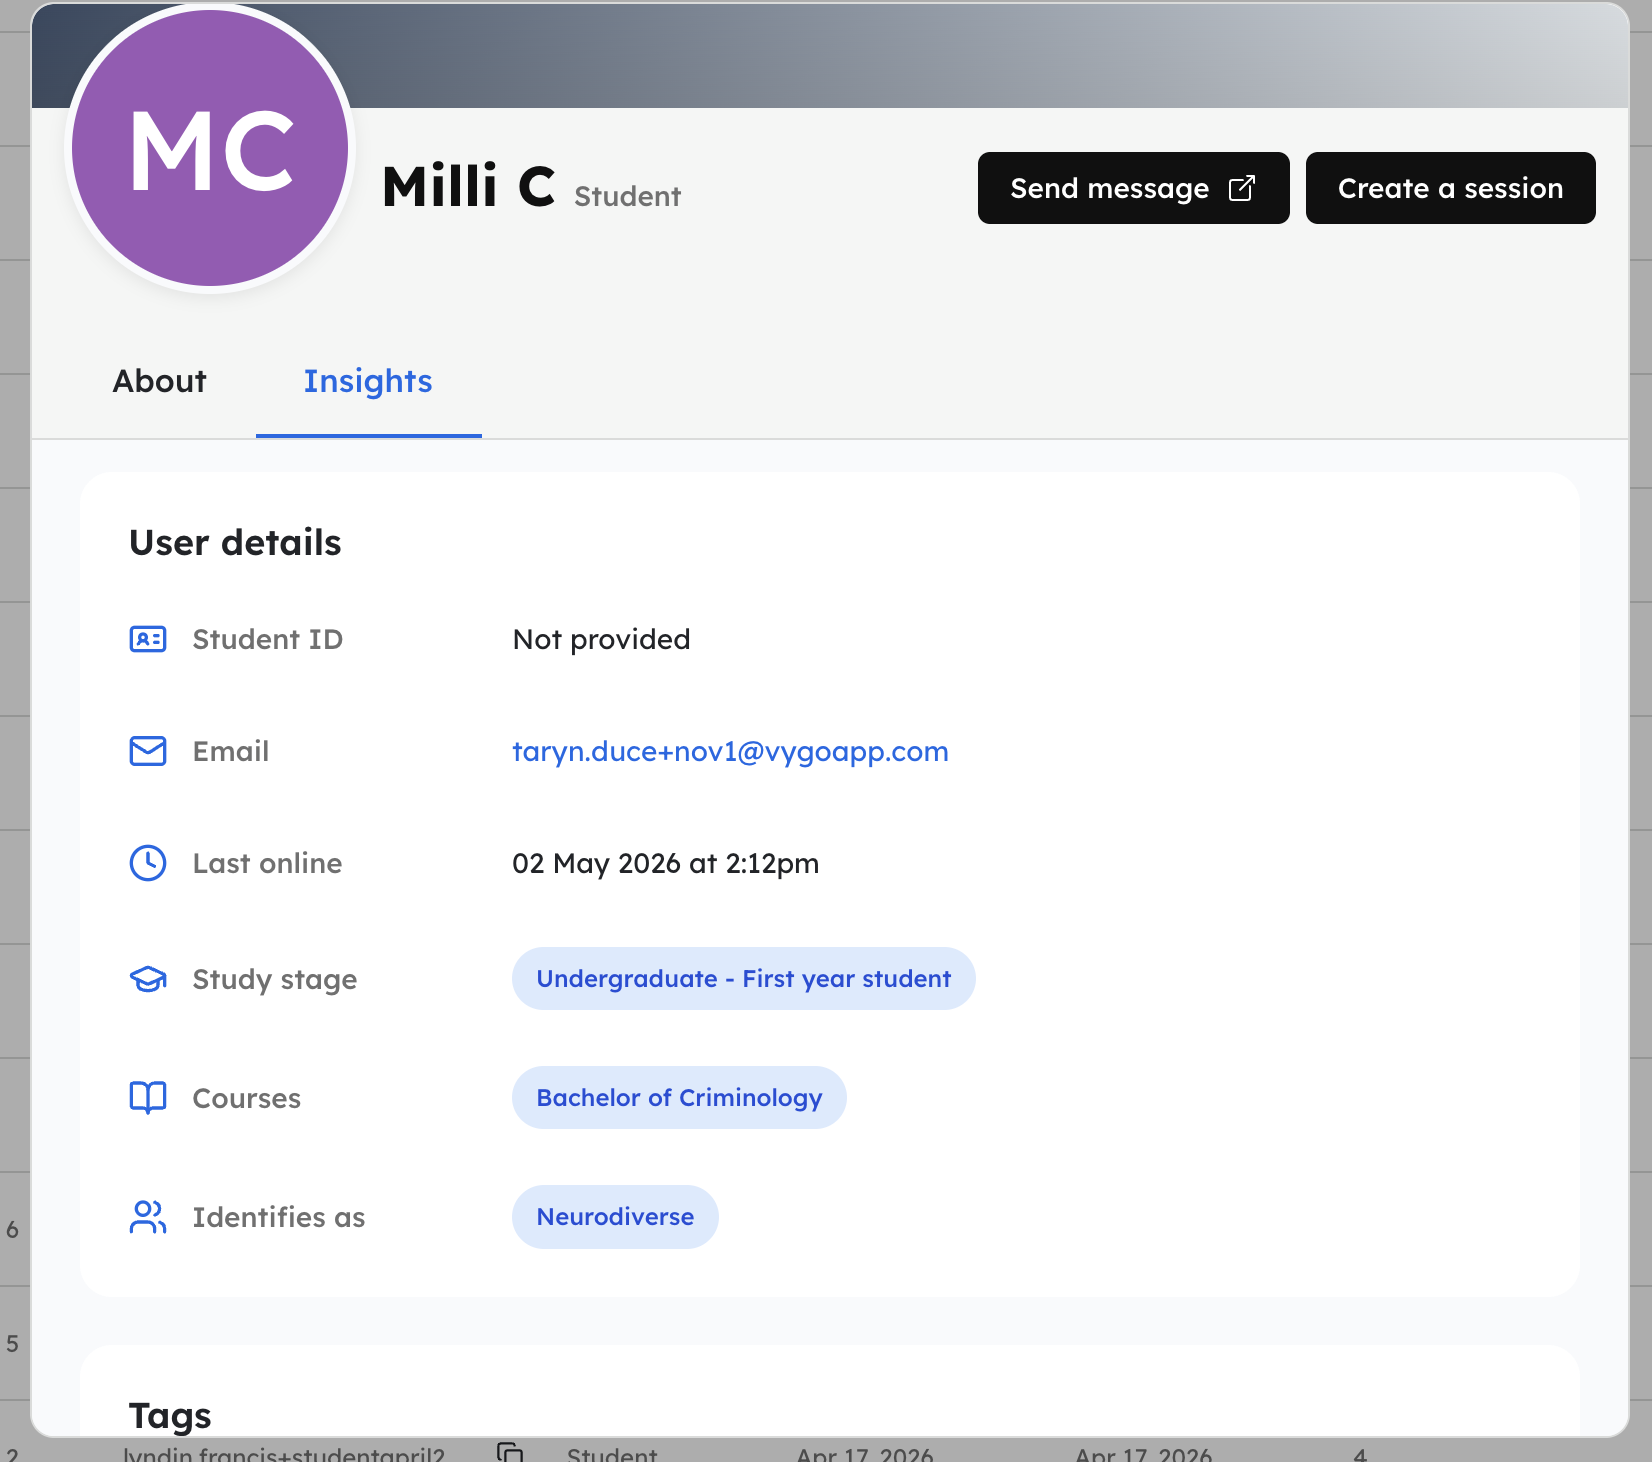
User Insights includes:
- User details
- Public tags
- Private tags
- Engagement summaries
- Historical activity
- Notes and participation history
For more information, see:
Understanding User Insights
Performing Bulk Actions
The User Dashboard allows administrators to perform actions across multiple users at once.
To perform a bulk action:
- Select one or more users
- Open the Options menu
- Choose the required action
Available bulk actions may include:
- Add to Program
- Connect to a Supporter
- Send Bulk Message
Available actions depend on your role permissions.
Add Users to a Program
Administrators can add selected users to an existing program directly from the dashboard.
This is commonly used when:
- Managing cohorts
- Assigning students into support programs
- Moving users between programs
Connect Users to a Supporter
Administrators can connect selected users with supporters in bulk (up to 10 at a time).
This helps streamline:
- Mentoring workflows
- Advisor allocations
- Student support matching
Sending Bulk Messages
Bulk messaging allows administrators to send personalised messages to multiple users simultaneously.
Messages can include dynamic fields such as the user’s first name to create a more personalised experience.
For detailed instructions, see:
Sending Bulk Messages to Students
Exporting User Data
The dashboard supports CSV exports for filtered user lists.
Administrators can export:
- User information
- Engagement data
- Filtered cohorts
- Program-based user lists
This can assist with reporting and operational workflows outside the platform.